How to create a backyard test garden for detecting
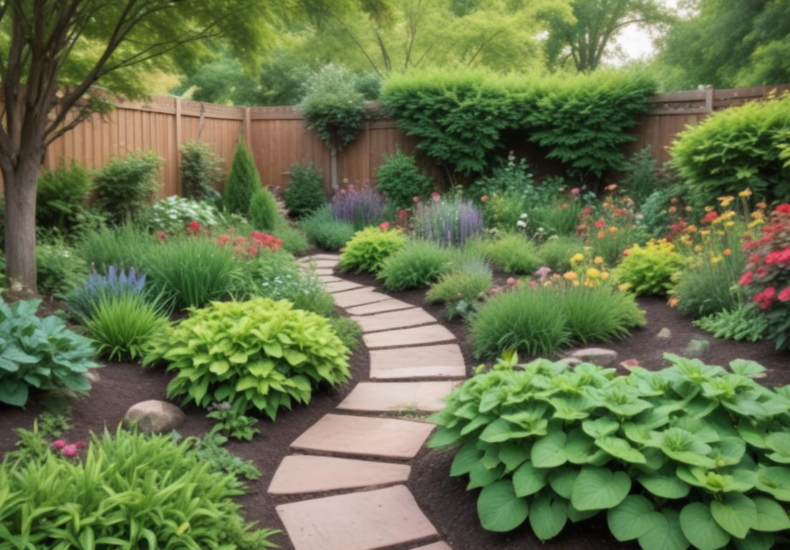
Selecting the optimal location for your test garden is critical, especially if the purpose is to enhance your detector practice. First, look for an area that’s representative of the range of environments you might typically encounter during metal detecting. This might be a mix of sandy areas, loamy soil, and even regions with higher clay content if applicable. It’s essential to avoid high-traffic areas where the soil might be compacted, as this does not provide an accurate ground response for practice scans.
Another important factor to consider is the influence of external metal interference. Ensure the chosen section of your backyard is free from underground pipes, overhead wires, or any nearby metal objects that could skew the responsiveness of your metal detector. Remember, the goal is to mimic the conditions you’re likely to experience while out using your detector, so keep the setup as natural and undisturbed as possible.
Orientation of the test garden also matters. North-south alignment is usually recommended to ensure even sunlight exposure, assuming that your primary concern involves growing typical backyard plants as part of the garden’s operational environment. Furthermore, consider accessibility and water availability, as these factors crucially affect both plant maintenance and the ease of conducting regular tests and scans.
By thoughtfully selecting the location of your test garden, you establish a controlled, effective environment for developing and refining both your gardening and metal detecting skills seamlessly.
Preparing the soil for optimal growth
Preparing the soil for your test garden involves several critical steps to ensure that your test garden supports optimal plant growth, thereby creating a realistic environment for detector practice. The first step is testing the soil’s pH level and nutrient content. This can be done using a home soil testing kit or by sending a sample to a local extension service. The ideal pH for most plants ranges from 6.0 to 7.0, although specific plants might require slightly different conditions.
Once you have your soil test results, amend the soil accordingly. If your soil is too acidic, applying lime can help raise the pH, while sulfur may be needed to lower the pH of alkaline soils. Nutrient deficiencies should be addressed based on the test results. Commonly, soils require the addition of organic matter such as compost or well-rotted manure which improves texture, fertility, and water retention. This step is crucial because well-prepared soil helps avoid scenarios where metal objects or other hidden anomalies could affect the metal detector’s responsiveness by altering the soil’s natural state.
Beyond chemical balance and nutrient levels, physical preparation of the soil is also essential. Tilling the soil to a proper depth—generally around 12 to 18 inches—allows roots to penetrate deeply and easily. Additionally, tilling helps to aerate the soil, breaking up clumps and removing rocks or other debris that might interfere with root growth and even, potentially, with the functionality of your detector during practice scans.
Finally, consider the ongoing upkeep of your soil. Regularly check and maintain the nutrient content and structure of your soil. This might mean periodic re-application of organic materials or further pH adjustments, as the dynamic nature of gardens means that soil conditions can change over time. A well-maintained soil ensures a thriving garden and by extension, a more effective and realistic practice environment for your metal detecting skills.
By investing time in these soil preparation techniques, you establish a robust foundation for both your plants and detector practice in your test garden, allowing you to simulate and respond to a variety of underground conditions confidently.
Choosing plants that thrive in your climate
Choosing plants that thrive in your climate is essential for creating an effective test garden that enhances your detector practice. Plants that are well-suited to your local environmental conditions will grow robustly, providing a realistic backdrop and varying soil conditions during your metal detecting exercises. To select the right plants, start by determining your hardiness zone, which can be found using resources like the USDA Plant Hardiness Zone Map. This zone guide helps you understand which plants are most likely to thrive in your geographical area.
Consider the local weather patterns as well—temperature ranges, rainfall averages, and seasonal changes—since these factors significantly influence plant health and growth. For instance, if you’re in a region that experiences dry summers, it would be practical to choose drought-resistant plants. These not only require less maintenance but also alter the soil conditions in a way that can be useful for honing your skills in detecting metal objects in different types of dry soils.
Furthermore, remember to take into account the sunlight exposure in your chosen location of the test garden. Some plants require full sun, while others need partial shade to flourish. Misalignment between plant needs and available sunlight can lead to weak growth, affecting the soil condition and, subsequently, your detector practice by reducing the challenge presented by healthy, dense plant roots.
A variety of plants can be advantageous for simulating different detecting scenarios. For instance, incorporating both deep-rooted plants like trees or shrubs and shallow-rooted plants like grasses or annuals can create varied soil textures and root densities. This diversity is valuable as it recreates more of the variety one might encounter in actual metal detecting outings. Additionally, plant diversity encourages biodiversity in your garden, attracting different insects and animals, which further impacts the soil environment and can add complexity to your metal detecting practice.
Including native plants in your test garden is also beneficial as they are adapted to the local climate and soil conditions, making them easier to maintain and more likely to thrive. This ensures that the test garden remains consistent and durable over time, providing you with a reliable venue for practicing your detecting skills throughout the changing seasons. Moreover, they can also provide insights into how natural, undisturbed soils in your area might respond to your metal detector, which is invaluable for effective field practice.
By thoughtfully selecting plants according to climate compatibility and the specific needs of your test garden, you not only make your gardening endeavor more successful but significantly enhance your metal detecting practice through realistic and varied underground scenarios.
Monitoring and collecting data in your test garden
Monitoring and collecting data in your test garden is fundamental for assessing the effectiveness of your detector practice and for making informed decisions about improvements. The process begins by setting specific metrics to monitor. For instance, recording the frequency and type of metal objects detected, the depth at which they are found, and the conditions under which they are detected (such as soil type or moisture levels).
A systematic approach to recording this data is essential. Consider using a journal or a digital spreadsheet to track each practice session. Note down the date, time, weather conditions, specific settings used on your metal detector, and outcomes of each detection attempt. This data will help you understand patterns over time, such as whether certain conditions result in more successful detection of metal objects or if adjustments in detector settings may have influenced the outcomes.
Photographic documentation of the test garden can also be invaluable. Taking pictures of the areas before and after each session can help you visually assess changes in the environment and the effect these might have on your detector’s performance. It might also be useful to map out the test garden, marking spots where metal objects are frequently found, which could indicate specific areas where you might want to focus your practice or further adjust the soil conditions.
Besides physical monitoring, it’s also beneficial to integrate some form of sensory tracking, like noting any unusual sounds from the detector that could indicate hidden anomalies in the soil not visible to the naked eye. This could provide insights into the subtler aspects of detector feedback, helping to refine your technique and understand your equipment’s alerts better.
Finally, regular review and analysis of the data collected provide critical insights into how your test garden is evolving and how well it is supporting your detector practice. This ongoing evaluation will likely suggest modifications—for instance, altering soil composition or moisture levels, adjusting the layout of the garden, or experimenting with different metal objects to bury and detect. Such iterations are crucial in continually enhancing the realism and effectiveness of your test environment.
Through diligent monitoring and data collection in your test garden, you can create a robust platform for advancing your metal detecting skills, ensuring that each practice session is effectively contributing to your improvement and readiness for real-world scenarios.
Analyzing results and making improvements
Analyzing the collected data from your test garden and implementing improvements based on these insights are crucial steps in optimizing both your garden’s condition and your detector practice. This stage involves a detailed review of the data accrued through monitoring efforts. Compact this information to uncover patterns or issues in soil conditions, plant health, and the detection of metal objects.
Evaluate if certain parts of the garden deliver consistent results or if there are areas where metal objects are more often missed or falsely detected. This might indicate a need for soil reconditioning or perhaps rearranging the types of plants grown in problematic areas to change soil texture and compaction levels strategically.
Quantitative analysis should focus on the depth accuracy of your metal detector in different sections of the garden. If metal objects are continuously found at inaccurate depths compared to their known burial depth, consider whether this might be due to certain soil characteristics, such as moisture content or metallic mineral levels, which may require adjustment.
Based on the findings, develop a plan for targeted interventions. For example, if data suggest that detection accuracy decreases after rainfall, experiment with adjusting soil drainage by incorporating more gravel or sand in high-moisture areas. Alternatively, if certain plants’ root systems seem to obscure your detector’s sensitivity, replacing them with species that have less intrusive root systems could be beneficial.
It is also essential to consider the feedback from your metal detector itself as part of your analysis. If the device frequently signals false positives, this could be an indication of either high mineralization in the soil or nearby metal contamination. Addressing these issues might involve amending the soil with elements that can neutralize excess minerals or moving the test garden’s location slightly to mitigate external metal interference.
Setting up controlled experiments within the garden can further enhance your understanding and refine your techniques. Introducing known quantities and types of metal objects at varying depths and in different soil conditions can help calibrate your detector more precisely. This iterative testing process allows you to fine-tune both your equipment’s responsiveness and your personal detection skills under controlled, yet varied, conditions that mimic real-world scenarios.
By analyzing the interactions between soil conditions, plant behavior, and detector performance in your test garden, you can systematically enhance the setup’s effectiveness for practicing detection. Such continuous improvement not only sharpens your skills but also deepens your understanding of the myriad factors that influence metal detecting outcomes.
Leave a Reply