How to build your own DIY metal detector
To embark on crafting your own DIY metal detector, the first step is assembling all the required materials and tools. You’ll need a variety of electronic components, starting with a basic printed circuit board (PCB). The choice of PCB will depend on the complexity and specifications of your design—a simple single-sided board should suffice for beginners.
Additionally, you’ll need a power source, typically a 9V battery, to supply your device. Ensure you also have a battery holder to secure it to your metal detector. The operational heart of your homemade metal detector is its integrated circuit (IC). A commonly used IC in DIY projects is the 555 timer IC, known for its stability and versatility.
You must also procure resistors and capacitors of various capacitances and resistances, as specified by your circuit design. A potentiometer is useful for adjusting the sensitivity of the detector. When it comes to the detecting coil, copper wire (around 24 gauge) will be needed to create it. The wire’s coil serves as the detecting aspect of the detector, sensing metal objects when electricity passes through it.
For the assembly, include a soldering iron and solder, as well as basic tools like wire strippers, a screwdriver, and pliers. These tools will aid in the meticulous assembly of your detector. Additionally, gathering materials such as electrical tape or heat shrink tubing to insulate exposed wires and prevent short circuits is crucial.
Last but not least, to house your circuitry and form the frame of your detector, you’ll require some durable material. PVC pipes or a lightweight metal like aluminum are excellent choices for the shaft and handle. Ensuring that all materials are gathered before starting the project can save time and streamline the building process, paving the way for a successful construction phase in your journey on how to build a homemade metal detector.
Assembling the circuitry
Once you have all your materials ready, the next step in building your DIY metal detector is assembling the circuitry. This phase is crucial as it involves bringing together the electronic components that will power and control your detector. Start by placing your 555 timer IC on the PCB. This IC is the foundation of your circuit and will generate the pulses needed to detect metal objects.
The positioning of the IC should align with the PCB layout that you’ve either designed or sourced. Ensure that each pin of the IC correctly matches the corresponding pad on the board. Using a soldering iron, carefully solder the IC to the board, ensuring that each joint is secure and well-connected. This will help in avoiding any loose connections that can lead to malfunctioning of your homemade metal detector.
Next, install the resistors and capacitors according to your schematic. These components must be precisely placed to match their values needed for the circuit to function effectively. For instance, capacitors will help stabilize voltage supply to the IC, while resistors will control the flow of current. The soldering here needs to be neat, ensuring no shorts are caused by overlapping wires or solder. Each component’s orientation and connection must adhere strictly to the schematic to guarantee your detector’s effectiveness.
Following the passive components, attach the potentiometer, which serves as an adjustable resistor. This component is critical as it allows you to adjust the sensitivity of your detector. The more sensitive the detector, the smaller or deeper the metal object it can detect. Securing the potentiometer properly to the PCB and ensuring easy access for adjustments will enhance the user experience of your DIY metal detector.
Once all components are fixed on the PCB, connect the battery holder and ensure your 9V battery fits well. A secure fit is necessary to avoid power disconnections while using the detector. From here, take your time to inspect each connection. Look out for any potential shorts or missed connections that could impair the function of your metal detector.
With the circuitry assembled, you are one step closer to completing your project on how to build a DIY metal detector. Ensure the assembled board is safely mounted on your chosen frame material, protecting it from mechanical damage and exposure to the elements. Properly covered and secured electronics are key to the longevity and functionality of your homemade metal detector.
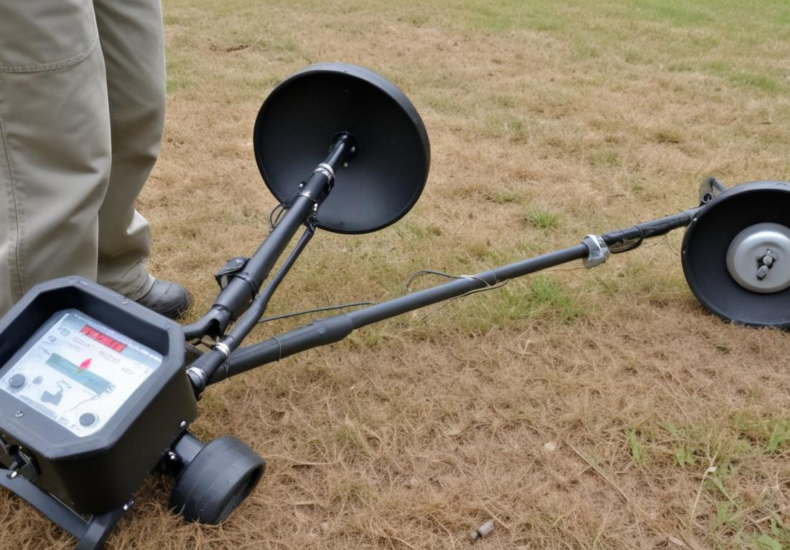
Constructing the coil and handle
With the circuitry of your DIY detector securely assembled, the next crucial step is constructing the coil and handle, which will form the physical structure of your homemade metal detector. The coil, particularly, is essential as it acts as the sensor, reacting to metal objects underground.
To start, you’ll need to construct the search coil. Wrap your 24 gauge insulated copper wire tightly around a circular former, such as a piece of PVC pipe or a small round container, to create the coil. Aim for about 100 to 150 turns of wire, ensuring that the coils are neatly layered and tightly wound to maximize the sensitivity of your detector. After wrapping, secure the ends of the wire with tape to prevent unwinding, and carefully remove the coil from the former.
Once the coil is prepared, the next step is to encapsulate it in a protective cover to shield it from environmental factors and physical damage. Epoxy resin or a similar hardened compound can be used to coat the coil. Ensure the coating is even and free from bubbles, as any gaps or weak points could compromise the coil’s effectiveness and durability.
Following the coil construction, you need to focus on the handle and the shaft of the detector. Lightweight materials such as PVC pipes or a sturdy but light metal like aluminum are ideal as they provide strength without adding much weight, making it easier to handle the detector for prolonged periods. Cut the material to your desired length, ensuring it is comfortable for your height and arm length.
The next step is to attach the coil to the lower end of the shaft. This can be achieved using brackets or a strong adhesive. Make sure that the coil is securely fastened and positioned correctly to maintain balance and ensure efficient functionality when sweeping the detector over different surfaces.
At the top end of the shaft, install a simple crossbar or handle, which will serve as the primary handhold. Affix any controls or the battery compartment near the handle, ensuring they are easily accessible. If your design incorporates adjustable controls, like the potentiometer for sensitivity adjustments mentioned earlier, positioning them within easy reach will improve the usability of your DIY detector.
With these components assembled, your next step in learning how to build a homemade metal detector is to join the handle and coil assembly with the previously assembled circuitry. Ensure all connections between the control unit, the battery, and the coil are secure and insulated to prevent any electrical shorts or disconnections during use. Your DIY metal detector is now taking a solid form, ready for testing and fine-tuning to ensure its functionality and efficiency.
Testing and troubleshooting

Now that your DIY detector has been physically assembled, it’s imperative to conduct thorough testing and troubleshooting to ensure its optimal performance. Begin this phase by powering up the detector with the 9V battery. Listen for any initial sounds or watch for signals that indicate the circuit is active. This step confirms that your basic setup is functioning.
The first test involves a simple air test to confirm the detector’s ability to sense metal. Pass various metal objects in front of the coil, starting with larger objects like a soda can and then moving to smaller items like coins or nails. This checks the sensitivity of your homemade metal detector. If the detector fails to pick up any objects, revisit the connections at the coil and the settings on the potentiometer, which controls the sensitivity.
If the initial test results are unsatisfactory, assess the assembly for common issues such as loose connections or incorrect component placement. Double-check that all soldered joints are solid, and ensure that there are no short circuits present on the board. If there’s a lack of responsiveness, it may help to adjust the potentiometer gradually to find the optimal setting for sensitivity.
Another effective troubleshooting method is to verify each part of the circuit independently. Disconnect the coil and test it with a multimeter to ensure there’s continuity, and then test other components like the capacitors and resistors to confirm they match the specifications of your design. Misplaced or faulty components can often lead to the detector not functioning correctly.
If your metal detector still doesn’t work as expected, it’s worth reviewing the entire design critically. Sometimes, even simple mistakes in the wiring diagram or a misunderstanding of the circuit schematics during assembly could cause problems. Compare your built circuit against the schematic or source material carefully. It’s essential in the process of learning how to build a reliable homemade metal detector.
Through meticulous testing and troubleshooting, you’ll refine the functionality of your DIY detector. Each step you take to diagnose and fix issues not only helps in making your device operational but also deepens your understanding of the electronics involved in building a metal detector from scratch.
Enhancing sensitivity and range
Enhancing the sensitivity and range of your DIY detector is a pivotal step in ensuring its effectiveness for practical use. It’s crucial that you can detect smaller metallic items or those that are deeper in the ground. To improve sensitivity, consider the configuration and quality of the coil used in your detector. Larger coils tend to detect deeper metals but may miss smaller objects close to the surface. Conversely, a smaller coil increases sensitivity to small objects but at shallower depths. Experimenting with different sizes and types of coils can help you find the perfect balance for your needs in various terrains.
Also, adjusting the frequency at which your detector operates can have a significant impact on sensitivity and depth. A higher frequency increases sensitivity to smaller objects, while a lower frequency provides deeper penetration for finding larger items buried deep. Depending on the primary use of your homemade metal detector, adjusting this setting can enhance the detector’s response to the metals you are most interested in finding.
Another effective way to boost sensitivity and range is by refining the control settings of your detector. The potentiometer installed during the assembly can be fine-tuned to get the maximal response from your setup. Small adjustments can make a considerable difference, and it’s beneficial to test these changes in a controlled environment where you know the types and depths of metal present.
Fine-tuning the discrimination settings also plays a crucial part in enhancing your detector. This setting helps you ignore unwanted metal types, reducing the number of false positives and allowing more focus on the metals that interest you. Through careful calibration, you can tailor your detector to be highly effective in differentiating between types of metals, which is especially useful in areas with diverse metal deposits.
Lastly, regular updates and maintenance of your DIY metal detector are essential. Periodically check all connections and components for wear and tear or potential upgrades. Sometimes, replacing an older component with a more efficient or modern version can significantly improve performance. Also, ensuring your detector is always well-calibrated according to the manufacturer’s specifications or your personalized modifications is key in sustaining its sensitivity and range.
By taking these steps to enhance the effectiveness of your DIY metal detector, you elevate its ability to perform efficiently in various detecting conditions. Whether you’re searching on the beach, in old battlefields, or your backyard, these enhancements will help ensure your homemade metal detector has a successful and productive use.
Leave a Reply